


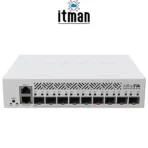


The MikroTik CRS310-1G-5S-4S+IN Switch is a high-performance, compact switch designed to deliver seamless networking solutions. It is part of MikroTik’s Cloud Router Switch (CRS) series, renowned for its versatility, advanced features, and cost-effectiveness. Whether you are setting up a small office network or upgrading an enterprise environment, this MikroTik switch provides optimal performance and flexibility.
MikroTik CRS310-1G-5S-4S+IN Switch
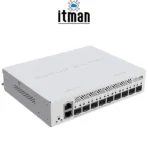
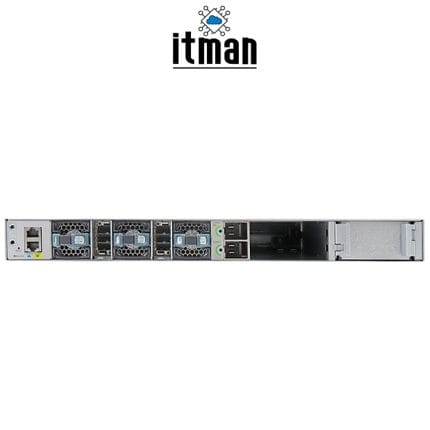
The MikroTik CRS310-1G-5S-4S+IN Switch is a Layer 3 managed switch, offering both gigabit Ethernet ports and fiber-optic ports for maximum connectivity options. It features one Gigabit Ethernet port (1G), five SFP ports (1G), and four SFP+ ports (10G), making it ideal for various networking needs. The device is equipped with a powerful processor that supports advanced features like routing, VLAN support, and more. This versatile device is tailored for both small businesses and larger network infrastructures.
Key Features of the MikroTik CRS310-1G-5S-4S+IN Switch
- High-Speed Performance: With a combination of Gigabit Ethernet ports and SFP+ ports offering up to 10Gbps speeds, the MikroTik CRS310-1G-5S-4S+IN Switch is designed to handle heavy network traffic. This makes it suitable for applications such as high-bandwidth video streaming, large file transfers, and more.
- Advanced Routing Capabilities: Unlike basic unmanaged switches, this model offers Layer 3 routing functionality, allowing for efficient management of inter-network traffic and optimizing network performance.
- Multiple Connectivity Options: The variety of ports, including SFP and SFP+, provides flexibility in choosing the appropriate connection medium, whether it’s copper or fiber-optic cables, ensuring easy integration into existing network setups.
- Compact Form Factor: Despite its powerful capabilities, the MikroTik CRS310-1G-5S-4S+IN Switch has a compact design, making it easy to install in network racks without occupying excessive space.
Advantages of the MikroTik CRS310-1G-5S-4S+IN Switch
- Versatility: This switch is highly adaptable to a wide range of networking scenarios, from small home office setups to larger enterprise environments, providing both Layer 2 and Layer 3 functionalities.
- Cost-Effectiveness: MikroTik is known for offering affordable networking solutions without compromising on quality or performance. The CRS310-1G-5S-4S+IN Switch offers exceptional value, especially when compared to other enterprise-level switches.
- Easy Configuration and Management: The switch can be easily configured using MikroTik’s RouterOS, which provides a user-friendly interface for both novice and advanced users. The software enables complete control over network traffic, VLANs, and security settings.
- Energy Efficiency: The MikroTik CRS310-1G-5S-4S+IN Switch is designed to be energy-efficient, reducing power consumption while maintaining high performance, making it a sustainable choice for long-term use.
Applications of the MikroTik CRS310-1G-5S-4S+IN Switch
- Small to Medium-Sized Business Networks: For small businesses looking to scale their network without breaking the bank, this switch provides a flexible, high-performance option with the capability to handle traffic-heavy applications.
- Home and Office Networking: Its small form factor and ease of setup make it an excellent choice for home and office networking, where users need to integrate multiple devices with reliable speeds and routing features.
- Data Centers and Enterprise Networks: The switch’s 10G fiber ports allow it to be used in data centers and enterprise environments where high-speed data transfer is essential, ensuring smooth operation in demanding network architectures.
How to Set Up MikroTik CRS310-1G-5S-4S+IN for Optimal Performance
Step 1: Unbox and Connect the Switch
- Unbox the MikroTik CRS310-1G-5S-4S+IN Switch carefully.
- Place the switch on a stable surface or rackmount it using the included mounting hardware.
- Connect the power supply (100-240V, 50/60Hz) and plug it into a power outlet.
Step 2: Connect to Your Network
- Ethernet Cable: Connect your computer or network device to one of the Gigabit Ethernet ports (1G) using an Ethernet cable.
- Fiber Ports: If using fiber connections, connect the appropriate transceivers to the 1G SFP or 10G SFP+ ports, depending on your setup. These can be used for interconnecting with other network devices like switches, routers, or servers.
Step 3: Access the RouterOS Interface
- Power on the device and wait for it to boot up.
- Open a web browser on your computer and enter the default IP address of the MikroTik switch (usually
192.168.88.1). - Log in with the default credentials:
- Username:
admin - Password: (leave it blank by default)
- Username:
- Alternatively, you can use Winbox (a Windows utility) or SSH for remote access.
Step 4: Basic Configuration
- Once logged in, you’ll land on the RouterOS dashboard.
- Change the default password to secure your device. Navigate to System > Password and set a new password.
- Configure the IP address for management by going to IP > Addresses and setting an IP address on the Ethernet interface that will be used for network management.
Step 5: VLAN Configuration (Optional)
If you need to segment your network with VLANs, do the following:
- Navigate to Bridge > VLANs and create the necessary VLANs.
- Assign VLANs to the appropriate interfaces (Ethernet or SFP ports) for segmentation.
- Ensure VLAN filtering is enabled if required by your network setup.
Step 6: Configure Routing (Layer 3)
- To enable Layer 3 routing, navigate to IP > Routes.
- Add static routes or configure dynamic routing protocols like OSPF or BGP, depending on your needs.
Step 7: Set Up Firewall and Security
- Navigate to IP > Firewall and configure the necessary firewall rules to secure your switch.
- Ensure that port security is configured if you want to restrict which devices can connect to the switch on certain ports.
Step 8: Enable and Monitor Performance
- Go to Tools > Traffic Monitor and enable monitoring to keep an eye on network traffic.
- Set up SNMP (Simple Network Management Protocol) if you want to integrate the switch with a monitoring system.
- You can also configure QoS (Quality of Service) settings to prioritize important network traffic for smoother performance.
Step 9: Save Configuration
Once you’ve finished the configuration, don’t forget to save the settings to prevent losing them during a reboot. You can do this by clicking System > Reboot and confirming that you want to save the changes.
Step 10: Test the Network
- Test the connection between devices connected to the switch by sending pings or testing network speeds.
- Ensure all interfaces are working properly and that traffic is flowing as expected, especially on the fiber ports (SFP/SFP+).
Bonus Tip: Software Updates
Always check for RouterOS updates to ensure your switch is running the latest version with bug fixes and new features:
- Navigate to System > Packages.
- Click Check for Updates, and if any are available, follow the instructions to update the firmware.
By following these steps, you can set up the MikroTik CRS310-1G-5S-4S+IN Switch for optimal performance, ensuring a stable and efficient network environment.
Best Use Cases for SFP+ Ports on MikroTik CRS310-1G-5S-4S+IN Switch
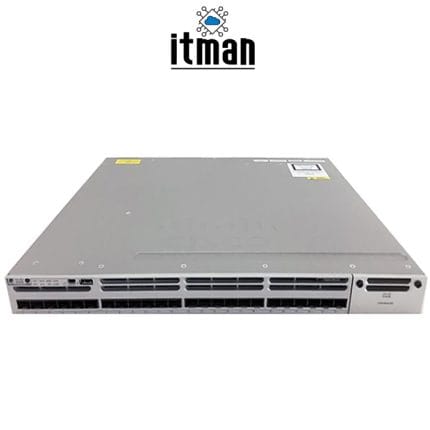
The SFP+ ports are designed for high-speed fiber connections, and they can be used for a variety of applications, including connecting to other high-speed switches, routers, or servers in a data center. For enterprises requiring robust connectivity, these ports ensure data is transmitted at speeds up to 10Gbps.
Technical Specifications Table
| Feature | Details |
|---|---|
| Product Name | MikroTik CRS310-1G-5S-4S+IN Switch |
| Ethernet Ports | 1 x Gigabit Ethernet (1G) |
| SFP Ports | 5 x 1G SFP |
| SFP+ Ports | 4 x 10G SFP+ |
| CPU | 800MHz ARM Cortex-A7 |
| RAM | 512MB |
| Storage | 16MB Flash |
| Operating System | RouterOS (MikroTik OS) |
| Power Supply | 100-240V, 50/60Hz, 0.5A |
| Dimensions | 214mm x 129mm x 44mm |
| Weight | 0.8 kg |
| Max Power Consumption | 15W |
| Mounting | Rackmountable |


Nora Khalil –
Powerful router with solid throughput and easy config The box came in great condition
Ethan Morris –
This CRS310 is a very nice compact switch and the quality feels premium. Price is good for a 2.5G and 10G mix setup. Packaging was solid and delivery was smooth with no delays. Overall a great experience and it works perfectly in my rack.
Fatima Al Hashimi –
السويتش أداءه قوي وجودته ممتازة خصوصا في الاستخدام مع منافذ SFP. السعر جيد مقابل الإمكانيات والتغليف كان محكم والتوصيل سريع. تجربة الشراء من ITMan كانت ممتازة.