

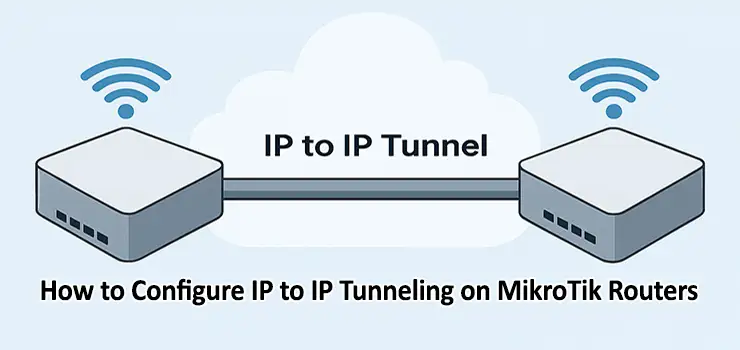
In modern networking, tunneling protocols play an important role in securely transferring packets from one network to another. MikroTik RouterOS supports different tunneling methods that allow administrators to connect remote sites, extend private networks over the internet, and enable advanced routing setups. One of the most commonly used techniques is IP to IP tunneling, also referred to as IP-in-IP or IPIP tunnel. Learning how to configure IP to IP tunneling on MikroTik Routers provides administrators with a simple yet effective way to link multiple branches or networks with low overhead.
This article is a complete guide on how to configure IP to IP tunneling on MikroTik, explaining concepts, step-by-step configurations, troubleshooting, and real-world use cases. Whether you are a beginner or an advanced user, this tutorial will help you master IP to IP tunnels on MikroTik routers.
What is IP to IP Tunneling?
IP to IP tunneling, also known as IPIP, is a lightweight method to encapsulate one IP packet inside another IP packet. Unlike more complex protocols such as GRE or L2TP, IPIP provides a simple and efficient way to route traffic between two endpoints. By learning how to configure IP to IP tunneling on MikroTik, network administrators can easily connect two separate networks using the public internet as a medium.
This technique is commonly used for site-to-site connections, routing experimental networks, or transporting IPv6 traffic over IPv4 infrastructure. The simplicity and low resource consumption make IPIP tunnels an attractive solution for many organizations.
Benefits of Configuring IP to IP Tunneling on MikroTik
When you configure IP to IP tunneling on MikroTik, you gain several advantages:
- Easy to set up with minimal configuration
- Low overhead compared to GRE or VPN-based tunnels
- Works seamlessly with static and dynamic routing
- Supports both IPv4 and IPv6 encapsulation
- Useful for lab environments, testing, and production networks
- Compatible across most MikroTik RouterOS devices
These benefits highlight why many network engineers choose to configure IP to IP tunneling on MikroTik for secure and efficient network extension.
Step-by-Step Guide to Configure IP to IP Tunneling on MikroTik
Step 1: Define the Requirements
Before starting, you need the following:
- Two MikroTik routers with public IP addresses
- Administrative access to RouterOS
- Basic knowledge of IP addressing and routing
Step 2: Create the IPIP Tunnel Interface

- Login to RouterOS via Winbox or SSH
- Navigate to Interfaces > IPIP Tunnel
- Click Add (+) and configure:
- Remote Address: Public IP of the remote MikroTik router
- Local Address: Public IP of your MikroTik router
- Tunnel Name: For example, ipip-tunnel1
This is the main step in configure IP to IP tunneling on MikroTik.
Step 3: Assign IP Addresses to the Tunnel
Once the interface is created:
- Go to IP > Addresses
- Assign a new private subnet to the tunnel interface (for example 10.10.10.1/30 on Router A and 10.10.10.2/30 on Router B).
This subnet will be used for communication across the tunnel.
Step 4: Configure Routing
To ensure traffic flows through the tunnel:
- Go to IP > Routes
- Add static routes pointing to the remote network via the tunnel interface.
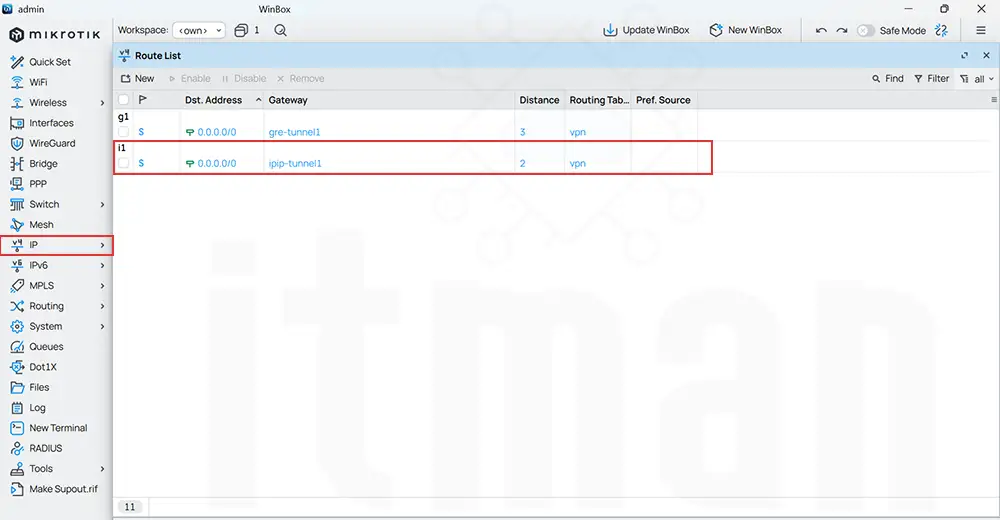
For example, if Router A needs to reach 192.168.20.0/24 behind Router B, create a route through the IPIP tunnel.
Step 5: Verify the Tunnel
Use tools like Ping or Traceroute within RouterOS to confirm that the tunnel is working. Successful pings between the tunnel IPs indicate that the configuration is correct.
Example Configuration Commands
On Router A:
On Router B:
This example demonstrates how to configure IP to IP tunneling on MikroTik using RouterOS CLI.
Use Cases for IP to IP Tunnels
- Connecting branch offices over the internet
- Extending private subnets securely
- Transporting experimental IPv6 traffic over IPv4 networks
- Linking cloud services with on-premises infrastructure
- Backup routing paths for redundancy
Each of these scenarios benefits from the simplicity of configuring IP to IP tunneling on MikroTik.
Troubleshooting IP to IP Tunneling on MikroTik
Even with simple configuration, issues may arise. Common troubleshooting steps include:
- Check that both routers can reach each other’s public IPs
- Ensure correct local and remote IP settings on both ends
- Verify that firewall rules are not blocking IP protocol 4 (IPIP)
- Confirm that routes are correctly added to point traffic through the tunnel
- Use
torchorpingtools within RouterOS to test packet flow
By following these checks, administrators can quickly identify and resolve problems with IP to IP tunnels.
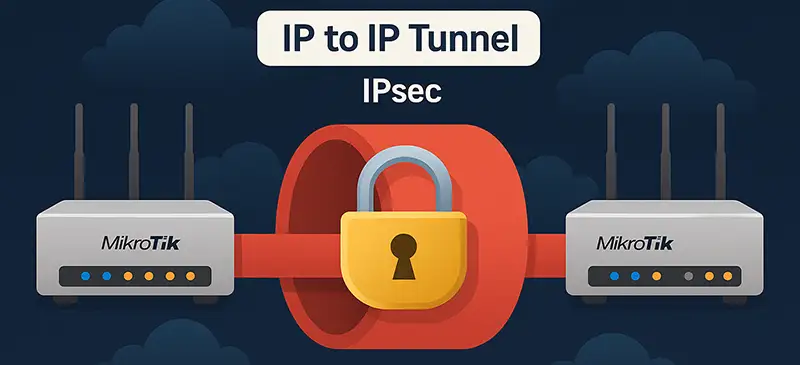
Security Considerations
While IPIP tunneling is simple and efficient, it does not provide encryption by default. To enhance security:
- Use firewall filters to restrict access to the tunnel endpoints
- Combine IPIP with IPsec to encrypt traffic
- Regularly monitor logs for suspicious activity
- Apply proper routing filters to prevent unauthorized access
These measures make configuring IP to IP tunneling on MikroTik a secure option for production environments.
Practical Tips for Administrators
- Always label tunnel interfaces for easy management
- Use small subnets like /30 or /31 for tunnel addressing
- Monitor tunnel uptime with Netwatch or scripting
- Combine tunnels with dynamic routing protocols like OSPF or BGP
- Backup configuration regularly to avoid downtime
These tips ensure smoother operations when you configure IP to IP tunneling on MikroTik.
Comparison with Other Tunneling Protocols
| Feature | IPIP Tunnel | GRE Tunnel | L2TP/IPsec |
|---|---|---|---|
| Overhead | Low | Medium | High |
| Encryption | None (can add IPsec) | None (can add IPsec) | Built-in with IPsec |
| Setup Complexity | Easy | Moderate | Higher |
| Best Use Case | Simple site-to-site links | Multiprotocol support | Secure VPN access |
As shown, IPIP is ideal for lightweight site-to-site connectivity, while GRE and L2TP are better suited for more complex scenarios.
Frequently Asked Questions (FAQ)
- What is the difference between IPIP and GRE tunnels on MikroTik?
IPIP supports only IP encapsulation and is lighter, while GRE supports multiple protocols and is more flexible. - Does IP to IP tunneling provide encryption?
No, by default IPIP does not encrypt. To secure it, you need to use IPsec. - Can I use IPIP tunnels with dynamic routing protocols?
Yes, you can run OSPF or BGP over an IPIP tunnel. - Is IPIP supported on all MikroTik devices?
Yes, all RouterOS devices support IPIP tunnels. - Which IP protocol number does IPIP use?
It uses IP protocol number 4. - Can I configure multiple IPIP tunnels on the same router?
Yes, you can create multiple tunnels for different peers or networks. - What are common issues with IPIP tunnels?
Misconfigured local/remote addresses, firewall blocking, or missing routes. - How do I monitor tunnel health?
You can use Netwatch, scripts, or SNMP monitoring. - Can IPIP tunnels carry IPv6 traffic?
Yes, IPIP can encapsulate IPv6 over IPv4 infrastructure. - What are the limitations of IPIP tunnels?
They are not encrypted and limited to IP protocol encapsulation only.
Conclusion
Learning how to configure IP to IP tunneling on MikroTik is essential for any network administrator who wants to extend networks securely and efficiently. With just a few configuration steps, you can build a reliable site-to-site tunnel that connects remote offices, transports data across different infrastructures, and integrates seamlessly with routing protocols. Although IPIP tunnels are simple, when combined with IPsec and proper security measures, they become a powerful tool for enterprise-grade connectivity.
By mastering the process to configure IP to IP tunneling on MikroTik, administrators can enhance their network infrastructure with a cost-effective, scalable, and dependable solution.