

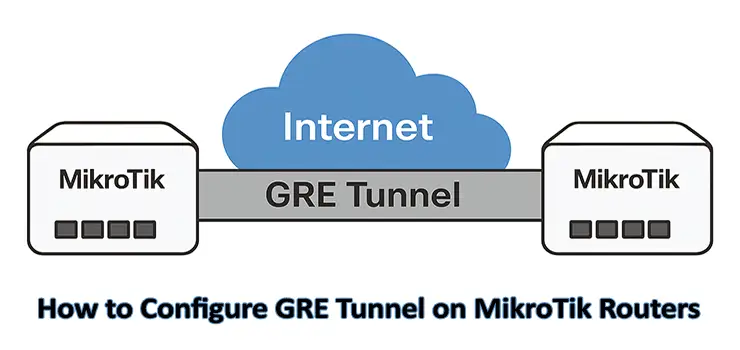
In modern networking, tunneling protocols are essential to create secure and flexible connections between remote sites. Generic Routing Encapsulation, commonly known as GRE, is one of the most widely used tunneling methods. If you manage networks using MikroTik devices, learning how to configure GRE Tunnel on MikroTik Routers can help you extend your infrastructure, connect branches, or support hybrid networks. This guide provides a comprehensive, step-by-step explanation to ensure you can successfully implement and optimize GRE tunnels on MikroTik.
What is a GRE Tunnel
A GRE Tunnel is a virtual point-to-point connection that encapsulates various network layer protocols inside IP packets. Unlike simple IP routing, GRE can transport multiple protocols such as IPv4, IPv6, and multicast traffic. By encapsulating traffic, GRE provides flexibility and enables the creation of secure VPNs, redundant connections, and advanced network designs.
When you configure GRE Tunnel on MikroTik Routers, you are essentially building a virtual link between two routers that can span over the public internet or a private WAN.
Why Use GRE Tunnel on MikroTik Routers
There are several benefits to configuring GRE tunnels on MikroTik devices:
- Supports multiple protocols including IPv4 and IPv6
- Works seamlessly over existing IP networks
- Enables site-to-site connectivity
- Can be combined with IPsec for encryption and security
- Provides flexibility for complex routing and redundancy setups
If your organization requires branch-to-branch communication or a reliable way to extend internal networks, knowing how to configure GRE Tunnel on MikroTik Routers is essential.
Requirements Before Configuration
Before you start, ensure you have the following:
- Two MikroTik routers with public IP addresses or reachable networks.
- Basic knowledge of IP addressing and routing.
- Administrative access to both MikroTik devices via Winbox, WebFig, or CLI.
- A clear network design that specifies tunnel source and destination addresses.
Step-by-Step Guide to Configure GRE Tunnel on MikroTik Routers
Step 1: Plan Your GRE Tunnel
Good planning ensures a smooth configuration process. Decide which two routers will be connected and what IP addresses will be used for the tunnel. For example:
- Router A Public IP: 203.0.113.1
- Router B Public IP: 203.0.113.2
- GRE Tunnel IP on Router A: 10.10.10.1/30
- GRE Tunnel IP on Router B: 10.10.10.2/30
This structure will form the foundation when you configure GRE Tunnel on MikroTik Routers.
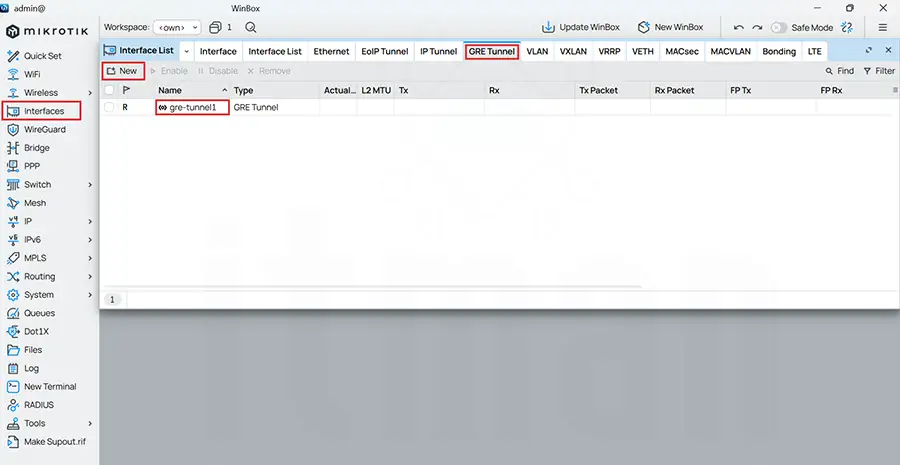
Step 2: Create the GRE Tunnel Interface
On Router A:
On Router B:
This step creates the GRE tunnel interface between the two MikroTik routers.
Step 3: Assign IP Addresses to the Tunnel
Now assign tunnel IP addresses to both sides.
Router A:
Router B:
By assigning these IPs, the GRE tunnel becomes a usable interface.
Step 4: Add Static Routes
If the goal is to connect private LANs behind each router, you must add static routes. For example:
Router A LAN: 192.168.1.0/24
Router B LAN: 192.168.2.0/24
On Router A:
On Router B:
With this step, traffic between the two LANs will flow through the GRE protocol.
Step 5: Testing the GRE Tunnel
Once the routes are in place, you should test connectivity. From Router A, try to ping the tunnel IP on Router B:
If the ping is successful, the GRE tunnel is working. You can also test by pinging a device in the opposite LAN.
Step 6: Securing GRE with IPsec
By default, GRE tunnels do not provide encryption. If security is a concern, it is highly recommended to combine GRE with IPsec. This ensures that the encapsulated packets are encrypted as they travel across the public internet.
On Router A:
On Router B:
Next, create the appropriate proposals and policies to protect the GRE traffic. Combining GRE with IPsec is a common best practice when you configure GRE Tunnel on MikroTik Routers for production use.
Advanced Configuration Options
Adjusting MTU and MSS
Encapsulation adds overhead, which can affect packet size. You may need to adjust the Maximum Transmission Unit (MTU) and Maximum Segment Size (MSS) on the GRE tunnel interface.
This ensures packets do not fragment unnecessarily.
Monitoring and Troubleshooting
MikroTik provides several tools to monitor and troubleshoot GRE tunnels. Commands such as /ping, /traceroute, and /tool torch can help you verify traffic flow and identify issues.
Redundancy and Failover
In more advanced setups, you can configure multiple GRE tunnels for redundancy. Pairing GRE with dynamic routing protocols like OSPF or BGP makes the solution more resilient.
Common Issues and Fixes
When you configure GRE Tunnel on MikroTik Routers, you might encounter some common issues:
- Incorrect IP addresses: Double-check source and destination IPs.
- Firewall rules blocking GRE traffic: Ensure GRE (IP protocol 47) is allowed.
- MTU mismatch causing fragmentation: Adjust MTU as required.
- IPsec misconfiguration: Make sure both peers use the same proposals and secrets.
Addressing these problems ensures a stable and reliable tunnel.
Practical Use Cases
- Branch Office Connectivity: Connect multiple remote offices into a single corporate network.
- Cloud Integration: Build GRE tunnels to cloud providers for hybrid deployments.
- Testing and Labs: Simulate WAN environments for training or testing purposes.
- Carrier Networks: ISPs often use GRE to manage traffic segregation.
By applying these use cases, you can see how configuring GRE protocol on MikroTik Routers can benefit real-world deployments.
Step-by-Step Summary
- Plan your IP addressing.
- Create GRE interfaces on both routers.
- Assign tunnel IP addresses.
- Add static routes for LAN subnets.
- Test connectivity with ping.
- Secure with IPsec if needed.
These steps form the complete process of configuring GRE Tunnel on MikroTik Routers.
Frequently Asked Questions (FAQ)
1. What ports or protocols does GRE use on MikroTik?
GRE uses IP protocol 47, not TCP or UDP. Ensure firewalls allow it.
2. Can GRE be used without public IPs?
Yes, but both routers must have routable addresses or NAT traversal rules.
3. Does GRE encrypt traffic by default?
No, you must combine GRE with IPsec for encryption.
4. What is the maximum throughput of a GRE tunnel on MikroTik?
It depends on the router model, CPU performance, and packet size.
5. Can I run dynamic routing protocols over GRE?
Yes, OSPF, BGP, and RIP work over GRE tunnels.
6. How do I check if GRE traffic is passing correctly?
Use /tool torch on the tunnel interface to verify packets.
7. Is GRE suitable for VoIP traffic?
Yes, but ensure QoS and MTU settings are optimized.
8. What happens if the tunnel endpoint changes IP?
The tunnel breaks unless dynamic DNS or scripts update the configuration.
9. Can GRE be used between MikroTik and Cisco devices?
Yes, GRE is standardized and works across vendors.
10. How many GRE tunnels can a MikroTik support?
There is no strict limit, but performance and resources of the device apply.
Conclusion
Configuring GRE Tunnel on MikroTik Routers is a powerful way to connect remote sites, extend networks, and enable advanced routing scenarios. By following the step-by-step guide provided here, you can plan, deploy, and secure GRE tunnels effectively. Whether for branch connectivity, hybrid cloud setups, or lab testing, GRE offers flexibility and compatibility across multiple protocols.
When properly implemented and secured with IPsec, GRE protocols become a reliable foundation for modern networking needs.