
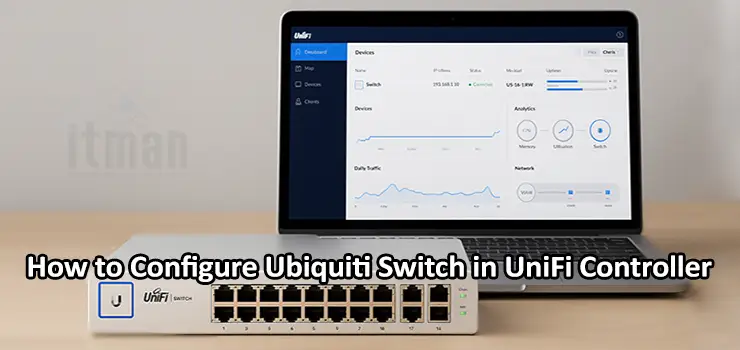
Setting up and managing a Ubiquiti switch through the UniFi Controller can dramatically simplify network management for businesses, home labs, and service providers. UniFi’s centralized interface gives you full visibility and control over your switches, VLANs, PoE budgets, and traffic analytics – all from a single dashboard. This step-by-step guide explains how to configure Ubiquiti switch devices, adopt them into UniFi Controller, create VLANs, enable PoE per port, and monitor live traffic and power consumption effectively.
Why Use UniFi Controller for Your Switches
The UniFi Controller (or UniFi Network Application) is a software platform that allows administrators to manage multiple UniFi devices from a single pane of glass. When you configure Ubiquiti switch devices through the controller, you get:
- Automatic firmware management and updates
- A unified topology view of your entire network
- Centralized configuration templates for ports and VLANs
- Real-time statistics on traffic, PoE power draw, and client activity
- Easy troubleshooting tools for link speed, errors, and utilization
Whether you are setting up a single UniFi Switch Lite 8-PoE or a stack of USW-Pro-48-PoE switches, this approach ensures consistency and reduces manual errors.
Step 1: Prepare Your UniFi Controller
Before you configure Ubiquiti switch hardware, ensure you have a working UniFi Controller instance. You can install it on a cloud key, UniFi Dream Machine, UniFi Gateway, or on a computer running UniFi Network Application. Make sure:
- The controller version is up to date (at least matching the switch firmware requirements).
- The device running the controller is reachable on the same Layer 2 network or has L3 adoption configured.
- You are logged in with an account that has administrator rights.
Once you confirm the controller is ready, you can move to adding the switch.
Step 2: Add the Switch to UniFi Controller
Connecting a new switch involves adopting it into the controller. This process securely links the device with the UniFi management interface.
- Connect the switch physically to your network and power it up (either with its power supply or PoE input if supported).
- Open the UniFi Controller dashboard and navigate to Devices.
- Wait a few seconds – the new switch should appear in the “Pending Adoption” state.
- Click on the switch, then click “Adopt.”
- The controller will push initial configuration to the switch and upgrade firmware if needed.
Once adoption is complete, the switch status will turn to “Connected” and you can begin configuring it.
Step 3: Basic Switch Configuration
After adoption, you can configure Ubiquiti switch details to match your network design.
- Change the switch name to something meaningful, like “Core-Switch-01.”
- Assign a static management IP address if required (under Settings > Network > Device).
- Enable SNMP or other monitoring features if you use external NMS tools.
- Upgrade firmware if prompted to ensure feature compatibility.
These initial steps guarantee that your switch is ready for VLAN and PoE configuration.
Step 4: Configure VLANs on Ubiquiti Switch
VLAN segmentation is one of the most common tasks administrators perform. UniFi Controller makes it straightforward.
- Go to Settings > Networks and create the VLAN networks you need. Define VLAN IDs, subnets, and gateways as required.
- After creating networks, go back to Devices, select your switch, and open the Ports tab.
- Click on the port you want to configure, then select the port profile:
- Access port – assign to a single VLAN for end devices.
- Trunk port – allow multiple VLANs for uplinks or other switches.
- Save the configuration and apply changes.
The controller will push the updated VLAN settings to the switch and activate them immediately.
Step 5: Configure PoE for Switch Ports
If you have UniFi switches with PoE capabilities, configuring power for access points, cameras, or VoIP phones is critical.
- Go to the switch’s Ports tab and select a port.
- Look for the PoE setting – you can choose Auto, On, or Off.
- For most UniFi devices, Auto is recommended because it negotiates the proper power level.
- Apply the change and watch the PoE budget indicator to ensure you are not exceeding available power.
Monitoring PoE usage helps prevent outages caused by overloaded power supplies, especially on high-density deployments.
Step 6: Monitor PoE and Traffic Usage in Dashboard
One of the biggest advantages of configuring Ubiquiti switch devices through UniFi Controller is visibility. The dashboard gives you:
- Real-time power draw per port
- Overall PoE budget usage
- Bandwidth consumption per client or per port
- Error counters, link speed status, and packet drops
To view this information, open the switch in Devices, navigate to Insights or Statistics, and review the graphs. This helps in capacity planning and troubleshooting bottlenecks.
Step 7: Configure Port Profiles for Consistency
If you manage many ports across multiple switches, port profiles save time. Instead of manually configuring each port, you can:
- Create a profile that includes VLAN settings, PoE status, and speed/duplex configuration.
- Apply the profile to multiple ports in one click.
- Use this approach for standardizing access ports for workstations or trunk ports for APs.
This reduces configuration drift and simplifies future changes.
Step 8: Set Up Alerts and Notifications
The UniFi Controller allows you to configure alerts for switch events. Enable email or push notifications for events such as:
- Switch disconnected
- High CPU or memory utilization
- PoE budget warnings
- Firmware update availability
These proactive alerts let you resolve issues before they impact users.
Step 9: Troubleshooting with UniFi Tools
If a port or VLAN does not work as expected, the controller offers built-in troubleshooting tools:
- Cable test feature to check cable quality and length
- Deep packet inspection to analyze traffic types
- Port toggling (disable/enable) to reset connectivity
- Client history to see when devices were connected or disconnected
These features make network operations faster and reduce downtime.
Best Practices When You Configure Ubiquiti Switch
- Always plan VLANs and IP addressing ahead of time.
- Keep firmware consistent across switches to avoid feature mismatch.
- Monitor PoE budgets regularly when adding new powered devices.
- Use descriptive names for switches and port profiles to avoid confusion later.
- Backup UniFi Controller settings frequently to protect configurations.
Example Use Case: Small Business Deployment
Consider a small office with multiple departments needing isolated networks: HR, Finance, and Guest Wi-Fi. By using UniFi Controller:
- You configure Ubiquiti switch VLANs to segment traffic.
- Apply PoE to ports powering APs and VoIP phones.
- Use the dashboard to monitor usage and optimize switch capacity.
- Ensure security compliance by isolating sensitive networks.
This approach provides enterprise-grade management at an affordable cost.
Advanced Features for Experienced Users
UniFi switches also support more advanced options:
- RADIUS or 802.1X port authentication
- Port isolation for IoT devices
- Storm control and rate limiting
- Layer 3 routing (on models like USW-Pro)
These features are accessible through the UniFi Controller interface and allow further customization as your network grows.
Conclusion
Learning how to configure Ubiquiti switch devices in UniFi Controller gives you centralized control over your network. From adoption and VLAN configuration to PoE management and traffic monitoring, the process is designed to be intuitive yet powerful. With the right planning and best practices, you can achieve a stable, secure, and scalable network that supports your users reliably. Whether you are deploying one switch or a dozen, UniFi’s approach makes network management seamless and efficient.