

If you’re looking to improve your system’s performance or add a layer of data redundancy, learning how to set up RAID in Windows 10 is a smart move. RAID (Redundant Array of Independent Disks) is a storage technology that combines multiple physical drives into one logical unit. Depending on the RAID level, this setup can offer faster data access, protection from drive failure, or both.
Gaming Laptop Engineered for Victory.
Windows 10 allows you to create software RAID arrays using built-in tools like Disk Management and Storage Spaces, eliminating the need for dedicated RAID hardware controllers. Whether you’re a home user, gamer, content creator, or system administrator, this guide will show you exactly how to set up RAID in Windows 10, from planning to execution.
Understanding RAID Levels Supported in Windows 10
Before you set up RAID in Windows 10, you should understand the common RAID levels:
- RAID 0 (Striping): Improves performance by splitting data across two or more drives. No redundancy—if one drive fails, all data is lost.
- RAID 1 (Mirroring): Duplicates data across two drives for redundancy. If one drive fails, the other keeps running.
- RAID 5 (Parity): Offers a balance of performance and redundancy. Needs at least 3 drives. Not supported via Storage Spaces in Windows 10, only via hardware RAID or Server OS.
- RAID 10 (1+0): Combines striping and mirroring. Needs at least 4 drives. Only available via hardware RAID.
For this guide, we focus on RAID 0 and RAID 1, which can be configured using Windows 10’s software tools.

Step 1: Prepare Your Drives
Before you can set up RAID in Windows 10, make sure you have the required number of identical hard drives or SSDs. For best results, use drives with the same capacity, speed, and interface.
Checklist:
- Backup all important data.
- Ensure the drives are connected internally (SATA/NVMe). External USB drives are not supported for RAID.
- All drives should be unallocated or formatted.
Step 2: Choose Between Disk Management and Storage Spaces
There are two methods to set up RAID in Windows 10:
Disk Management (RAID 0/1 via Dynamic Disks):
- Offers more control.
- Requires converting drives to dynamic disks.
- Slightly older interface, but powerful.
- Storage Spaces:
- Easier to use.
- More modern interface.
- Recommended for less technical users.
We’ll walk you through both methods.
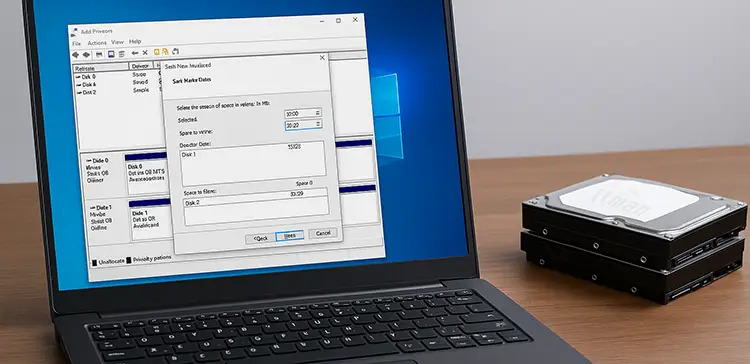
Method 1: Set Up RAID in Windows 10 Using Disk Management
This method is ideal if you want to create a striped (RAID 0) or mirrored (RAID 1) volume manually.
Step-by-Step: Using Disk Management
Open Disk Management:
- Right-click the Start menu.
- Select Disk Management.
- If asked, provide admin permissions.
- Convert Disks to Dynamic:
- Right-click each unallocated drive.
- Choose Convert to Dynamic Disk.
- Select all drives you want to include in the RAID.
Create RAID Volume:
- Right-click one of the dynamic disks.
- Choose:
- New Striped Volume (for RAID 0)
- New Mirrored Volume (for RAID 1)
- Click Next.
Select Drives:
- Add all intended drives to the array.
- Click Next.
Assign Drive Letter and Format:
- Choose a drive letter.
- Format using NTFS, with allocation unit size as default.
- Name the volume if desired.
- Complete Setup:
Click Finish.
Windows will create and mount the RAID volume.
Your new RAID array is now ready and visible in File Explorer.
Method 2: Set Up RAID in Windows 10 Using Storage Spaces
Storage Spaces is a more user-friendly feature in Windows 10 that simplifies the process of creating and managing RAID-like volumes.
Step-by-Step: Using Storage Spaces
Open Storage Spaces:
- Go to Control Panel > System and Security > Storage Spaces.
- Click on Create a new pool and storage space.
Select Drives:
- Select the available drives you want to include.
- Click Create pool.
Name and Configure the Storage Space:
- Give your pool a name.
- Choose Drive letter.
- Select the Resiliency type:
- Simple (No resiliency): Similar to RAID 0.
- Two-way mirror: Similar to RAID 1.
- Three-way mirror: Adds additional redundancy.
- Set the size (you can make it larger than physical space using thin provisioning).
Finalize:
- Click Create storage space.
- The virtual drive appears in File Explorer, ready to use.
This method is perfect for users who want to set up RAID in Windows 10 with ease and without diving deep into system tools.
Comparing Disk Management vs Storage Spaces
| Feature | Disk Management | Storage Spaces |
|---|---|---|
| Interface | Classic (Advanced) | Modern (User-friendly) |
| Supported RAID Levels | RAID 0, RAID 1 | Simple, Mirror, Parity |
| Hot-swapping support | No | Yes (some configurations) |
| Thin provisioning | No | Yes |
| Storage expansion | Manual | Automatic (in some cases) |
Both tools allow you to set up RAID in Windows 10, but Storage Spaces is generally recommended for casual or home users.
Best Practices When You Set Up RAID in Windows 10
- Use Identical Drives: Avoid mixing different brands, speeds, or sizes.
- Keep Backups: Even mirrored RAID is not a substitute for real backups.
- Label Drives Clearly: Physically label each drive in the case for future maintenance.
- Test Performance: Use benchmarking tools to verify RAID 0 performance gains.
- Monitor Health: Use tools like CrystalDiskInfo or manufacturer-specific software.
Troubleshooting Common RAID Issues in Windows 10
When you set up RAID in Windows 10, you may encounter some challenges. Here are solutions to common problems:
1. RAID Volume Not Appearing in Explorer
- Ensure the volume is formatted and assigned a drive letter.
- Reboot after setup to refresh system state.
2. One Disk Shows Errors or Fails
- For mirrored RAID: Replace the failed drive and rebuild the mirror.
- For striped RAID: Unfortunately, data recovery is difficult. Recreate array.
3. Storage Spaces Fails to Create Pool
- Ensure all drives are healthy and not in use.
- Clear partitions and retry.
Performance Tips After You Set Up RAID in Windows 10
- Enable write caching (Device Manager > Policies).
- Use AHCI mode in BIOS for best SSD performance.
- For RAID 0, ensure TRIM is enabled if you’re using SSDs.
- Keep firmware and drivers up to date for both storage and motherboard.
Is It Safe to Set Up RAID in Windows 10 for Critical Data?
While Windows 10 provides reliable software RAID capabilities, it’s important to understand that:
- RAID is not backup.
- RAID can fail due to OS corruption, power loss, or disk failure.
- For mission-critical environments, use RAID in combination with external backups and possibly hardware RAID solutions.
Alternatives to RAID in Windows 10
If you’re unsure about committing to RAID, consider these alternatives:
- Cloud backup services (OneDrive, Google Drive)
- File History and System Restore (built-in tools)
- NAS with RAID for network-based redundancy
- External USB 3.0 or Thunderbolt SSDs for speed boost
But if you want fast storage, local redundancy, or just to learn more about advanced disk management, choosing to set up RAID in Windows 10 is a great hands-on experience.
Conclusion: Start Small, Think Smart
Now that you know how to set up RAID in Windows 10, it’s time to take control of your storage setup. Whether you’re looking for speed or redundancy, RAID gives you a professional-grade storage solution without expensive hardware.
Begin with a simple RAID 0 or RAID 1 using Storage Spaces or Disk Management. As your needs grow, you can explore more advanced options like hardware RAID or Windows Server capabilities.