
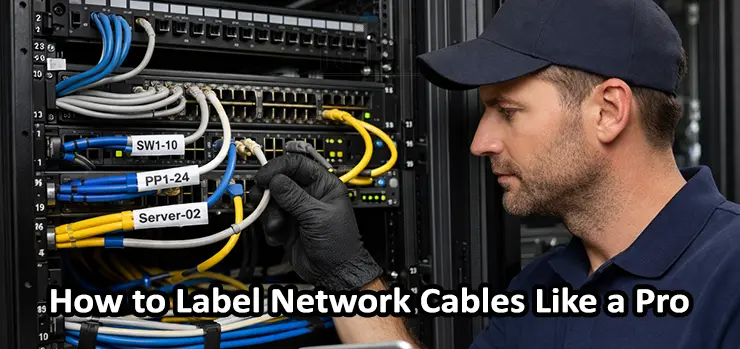
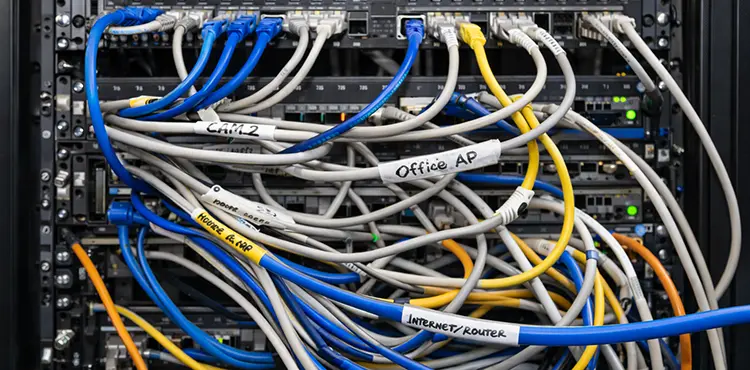
If you’ve ever opened a small network cabinet or a full server rack and found a tangled mess of Ethernet cables, you already understand why labeling is not optional. Clean cable management is great, but without clear identification, even the neatest rack becomes difficult to maintain. The truth is simple: knowing How to Label Network Cables properly saves time, reduces downtime, prevents human error, and makes future upgrades much easier.
In this guide, you will learn How to Label Network Cables like a professional network engineer. We will cover practical naming standards, label types, what to write on each label, best tools to use, common mistakes to avoid, and a step-by-step workflow you can apply in offices, server rooms, CCTV networks, and home labs.
Table of Contents
ToggleWhy Cable Labeling Matters More Than You Think
Many people only realize the value of cable labels when something goes wrong. A switch port goes down, a camera disconnects, a user loses network access, or an internet uplink drops. Then the troubleshooting begins:
- Which cable belongs to which room?
- Which port is connected to that access point?
- Is this cable going to the patch panel or directly to an endpoint?
- What VLAN or purpose is this line dedicated to?
When you implement a clean system for How to Label Network Cables, you get immediate advantages:
- Faster troubleshooting and fault isolation
- Easier maintenance during upgrades and expansions
- Reduced risk of unplugging the wrong cable
- Better documentation and easier handover between technicians
- Cleaner racks and more professional installations
- Improved safety and compliance in enterprise environments
Cable labeling is one of those small investments that pays back every single time you touch your network.
What “Professional” Cable Labeling Actually Means
Professional cable labeling is not just printing random stickers and placing them anywhere. A real professional approach to How to Label Network Cables means:
- Every cable has a consistent naming format
- Both ends of the cable are labeled
- Labels are durable and readable
- Labels match your network documentation
- Labels remain visible after cable dressing and ties
- The system can scale when you add more ports later
Most importantly, your labeling method should be understandable not only to you, but also to any IT technician who may work on your network later.
The Biggest Mistake: Labeling Only One Side
One of the most common mistakes in How to Label Network Cables is labeling only one end.
You must label both ends because:
- In racks, cables can be moved during maintenance
- Endpoints get replaced or moved
- Patch panels get re-terminated
- Technicians may unplug from either end
Best practice: label near the connector on both ends, but leave enough space so the label does not block the RJ45 latch or interfere with the port.
What Should Be Written on a Network Cable Label?
A label must answer the most important question instantly:
“What is this cable connected to?”
A professional label usually includes two essential pieces of information:
- The origin point (rack, patch panel, switch port)
- The destination point (room, device, wall outlet, access point)
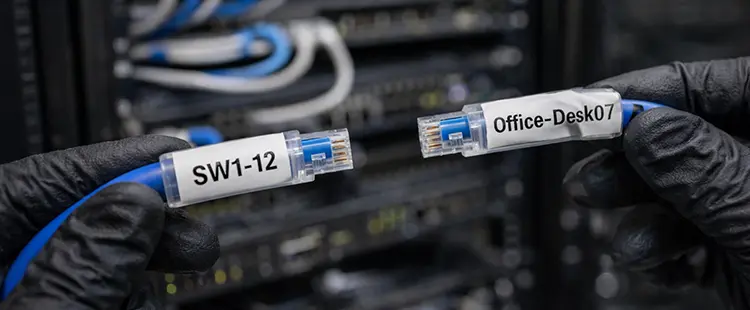
Common examples of useful label text
- PP1-24 → SW1-24
- SW1-12 → Office-Desk-07
- SW2-03 → AP-Lobby
- PP2-16 → Camera-Parking-04
- ISP-Modem → Firewall-WAN
If you want a clean, scalable method for How to Label Network Cables, keep labels short but meaningful.
Best Labeling Formats (Choose One and Stay Consistent)
Your labeling system must be standardized. Once you choose a format, you should keep it across the entire building or project.
Here are several proven professional formats you can use.
Format 1: Patch Panel Port to Switch Port
This format is perfect for rack environments with patch panels:
- PP1-01 / SW1-01
- PP1-02 / SW1-02
- PP2-24 / SW2-24
It is simple, structured, and helps during port tracing.
Format 2: Switch Port to Destination Name
This works well for small networks:
- SW1-01 → AP-MeetingRoom
- SW1-02 → PC-Reception
- SW1-03 → Printer-Admin
- SW1-04 → NVR-Office
This is one of the easiest ways to implement How to Label Network Cables quickly.
Format 3: Location-Based Labeling (Room + Outlet)
Ideal for structured cabling and bigger offices:
- Floor2-Room205-OutA
- Floor1-Lobby-Out03
- WH-ZoneB-Rack2
This format is excellent when you need scalability across multiple floors.
Format 4: Service-Based Labeling (VLAN or Role)
Useful for networks where specific lines are dedicated:
- CCTV-VLAN30-Cam07
- VoIP-VLAN20-Phone12
- GuestWiFi-AP06
This helps your team instantly understand the purpose of the line.
Step-by-Step: How to Label Network Cables the Right Way
Now let’s go through a practical workflow for How to Label Network Cables without confusion.
Step 1: Map Your Network First (Even a Simple One)
Before printing any labels, know your endpoints:
- How many switches do you have?
- How many patch panels?
- How many endpoints (PCs, cameras, access points, printers)?
- How are racks numbered?
- Are there multiple floors or zones?
Even a basic spreadsheet is enough at the start. The key is that every cable you label should match your documentation.
Step 2: Decide Your Naming Convention
Pick a format that fits your environment.
For example, a professional office with patch panels could use:
PP1-01 ↔ Office2-Desk01
A CCTV-focused project might use:
SW1-05 ↔ Cam-Parking-05
You do not need to overcomplicate it. Consistency is what makes How to Label Network Cables successful in real life.
Step 3: Label the Cable Before Installation (Best Option)
The most efficient method is to label each cable before it goes into the rack.
Why it helps:
- You avoid guessing later
- You reduce mistakes
- You keep the label in the correct position
If your cables are pre-cut and already installed, you can still label them afterward, but it takes longer.
Step 4: Label Both Ends Immediately
Once a cable is connected:
- Label the rack side (patch panel or switch)
- Label the endpoint side (wall outlet or device)
Doing both ends at the same time prevents future mismatches.
Step 5: Use Clear, Readable, Smudge-Proof Text
Handwriting can work for emergencies, but for professional results in How to Label Network Cables, printed labels are better.
Your text should be:
- High contrast
- Not too small
- Resistant to heat and moisture
- Resistant to rubbing and cleaning

Step 6: Test the Connection and Confirm the Label
Before moving to the next cable:
- Plug in
- Test link lights
- Confirm connectivity
- Verify destination device
- Update your documentation
This step is extremely important because the biggest labeling mistakes happen when people “assume” a cable’s destination.
Best Label Types for Ethernet Cables
Not all labels are equal. If you want long-lasting results, choose the right label style.
Wrap-Around Cable Labels (Best for Professional Work)
These labels wrap around the cable and are protected by a clear layer.
Pros:
- Durable and clean
- Won’t peel easily
- Great for racks and patch cords
Cons:
Needs correct sizing
This is one of the top recommendations for How to Label Network Cables in any serious environment.
Flag Labels (Best for Readability)
Flag labels stick out like a small flag.
Pros:
- Easy to read in tight spaces
- Good for thick cable bundles
Cons:
- Can get caught when moving cables
- Not as clean-looking in some racks
Heat Shrink Labels (Most Durable)
Often used in industrial installations.
Pros:
- Extremely durable
- Professional appearance
- Heat and moisture resistant
Cons:
- Needs heat gun
- Not convenient for existing cables
Self-Laminating Labels
A mix between wrap-around and protective labels.
Pros:
- Good protection
- Affordable
- Easy to apply
Cons:
Still can peel if low quality
For most businesses, self-laminating wrap labels are a perfect balance for How to Label Network Cables.
Best Tools for Cable Labeling (From Simple to Pro)
You don’t need expensive tools to start, but professional tools speed up the work.
Option 1: Permanent Marker + Pre-Cut Tags
Cheap and quick, not ideal long term.
Good for:
- Temporary installs
- Home lab quick labeling
Not ideal for:
- Hot racks
- Long-term professional support
Option 2: Label Maker Printer (Most Practical)
A simple label printer is a game-changer.
Good for:
- Offices
- CCTV projects
- Structured cabling
This is the fastest way to improve How to Label Network Cables without huge cost.
Option 3: Professional Cable Label Printer + Templates
Best for large companies and installers.
Features:
- QR code printing
- Serial numbering
- High durability tapes
- Template-based naming
If you label hundreds of cables monthly, this is worth it.
Label Placement: Where Exactly to Put the Label?
To apply How to Label Network Cables correctly, placement matters just as much as text.
Best placement rules:
- Place the label 2–5 cm from the connector
- Keep it visible even after cable ties
- Avoid covering the RJ45 clip
- Avoid blocking nearby ports
- Ensure it can be read without unplugging
In racks, labels near the connector make it easier to trace quickly without removing cable management bars.
Color Coding: Helpful or Dangerous?
Color coding can be very useful, but only if you document it and use it consistently.
Examples of common color coding:
- Blue: Standard data
- Yellow: Uplinks or trunks
- Red: Critical links (core, firewall)
- Green: CCTV
- White: Access points
However, do not rely only on color. Colors can be misused, and cables can be replaced later.
A professional method for How to Label Network Cables uses both:
- A written label
- Optional color coding
Easy Maintenance Tips After You Label Everything
Labeling cables once is great, but keeping the system clean is what matters.
Here are easy maintenance habits that make your labels valuable long-term.
Keep a Simple Cable List (Documentation)
Your documentation can be:
- A spreadsheet
- A printed rack diagram
- A digital network map
At minimum, track:
- Cable ID / Label
- Switch name + port
- Patch panel port (if used)
- Destination
- Notes (PoE, VLAN, device type)
Update Labels When Moving Devices
If you move a desk or relocate an access point, update the label. Otherwise, the label becomes misinformation.
Bad labels are worse than no labels because they cause wrong decisions.
Replace Damaged or Faded Labels Quickly
If a label is peeling, faded, or unreadable, replace it immediately. This is a small task that prevents future confusion.
Avoid Over-Tight Cable Ties
Cable ties can:
- Damage cable jackets
- Twist cables
- Hide labels
- Make cables hard to move
Use Velcro straps where possible for better maintenance.
Group Cables by Destination
In racks, grouping cables by:
- Floor
- Room
- Department
- Service (CCTV, Wi-Fi, VoIP)
makes troubleshooting faster.
This supports your overall strategy for How to Label Network Cables properly.
Common Cable Labeling Mistakes to Avoid
If you want professional results, avoid these mistakes.
Mistake 1: Using Random Names
Labels like:
- “Office cable”
- “Internet line”
- “Camera”
- “Router cable”
are not scalable. They become useless when your network grows.
Mistake 2: Not Labeling Patch Cords
People often label long runs but forget patch cords. Patch cords are the most frequently moved cables, and they need labeling too.
Mistake 3: Tiny Text That Nobody Can Read
If you need a flashlight and perfect eyesight to read the label, it’s not a good label.
Mistake 4: Labeling Only the Rack Side
As discussed earlier, both ends must be labeled. This is a key rule in How to Label Network Cables.
Mistake 5: Labels That Peel in Heat
Server rooms and network closets can get warm. Cheap labels can peel fast. Use quality self-laminating or wrap-around types.
How to Label Network Cables for Different Scenarios
Different environments need slightly different strategies.
Office Networks
Best approach:
- Patch panel + switch port mapping
- Destination by room or desk number
Example:
PP1-12 ↔ Floor2-Desk07
CCTV Systems
Best approach:
- Device numbering
- Zone-based naming
Example:
SW1-08 ↔ Cam-Warehouse-08
Tip: Always include camera number exactly as in the NVR.
Access Points and Wi-Fi Networks
Best approach:
AP name + location
Example:
SW2-06 ↔ AP-ConferenceRoom
This makes replacement and troubleshooting easy.
Home Lab or Small Business
Best approach:
Simple and readable naming
Example:
- SW1-01 ↔ Router
- SW1-02 ↔ NAS
- SW1-03 ↔ Office-PC
Even in a small setup, learning How to Label Network Cables brings huge value.
Adding QR Codes on Cable Labels (Advanced Tip)
If you manage many sites or large networks, you can place QR codes on your labels.
When scanned, the QR code can link to:
- A documentation page
- A spreadsheet row
- A ticket system reference
- A device inventory database
This is a next-level option for How to Label Network Cables in professional IT environments.
Quick Checklist: How to Label Network Cables Like a Pro
Before you finish your project, confirm:
- Every cable is labeled on both ends
- Labels use a consistent naming convention
- Labels match the documentation
- Text is readable without unplugging cables
- Label type is durable for rack conditions
- Cables are grouped and dressed cleanly
- Patch cords are labeled too
- Future expansion is planned (extra numbers available)
Professional Network Cable Labeling Service in Dubai
If you want your network to stay clean organized and easy to maintain our technicians in Dubai can handle the full cable labeling process for you from start to finish. We can inspect your current setup identify every connection label patch panels switches and endpoints using a clear professional standard and organize the cabling for better airflow and easier troubleshooting. Whether you have an office rack CCTV system access points or a full server room we make sure every cable is tagged correctly on both ends so future upgrades and maintenance become fast safe and stress free.
Frequently Asked Questions (FAQ)
What is the best way to label Ethernet cables?
The best way is to use self-laminating wrap-around labels with a consistent naming convention and label both ends. This ensures long-term durability and easy troubleshooting.
How often should I update cable labels?
Anytime a cable is moved, repatched, or its purpose changes, you should update the label. Label accuracy is more important than having a label at all.
Can I label cables using only color coding?
No. Color coding helps, but it is not enough. You still need written labels. A professional How to Label Network Cables system relies on readable text first.
Should I label patch panel ports too?
Yes. Patch panel ports should be labeled clearly. Many technicians label patch panels and cables using matching IDs for faster tracing.
What should I write on a cable label in a rack?
Include the patch panel port, switch port, and destination device or room. Keep it short and consistent.
Is handwriting okay for cable labels?
Handwriting is acceptable for temporary setups, but for professional maintenance and long-term clarity, printed labels are the best choice.
Conclusion: Label Once, Save Hours Forever
Cable labeling is one of the simplest upgrades you can make to your network maintenance process, but it delivers huge results. When you truly understand How to Label Network Cables, you stop wasting time tracing unknown lines, guessing port connections, or unplugging the wrong device during troubleshooting.
A professional labeling system gives you clean documentation, faster fixes, safer upgrades, and a network that remains manageable even as it grows. Whether you manage a small office switch, a full rack with patch panels, or a large CCTV deployment, the rules stay the same: label both ends, use a clear naming convention, keep it readable, and maintain it consistently.
If you want, I can also create a ready-to-use labeling template (Excel-style) for your network, including switch names, ports, patch panel mapping, and destination fields—so your whole labeling project becomes faster and error-free.